Another cracking game of Spectre Operations today at Entoyment! After the last small game we fancied trying something a little bigger, so this week we knocked up a hostage rescue scenario featuring a professional rescue team against 2 teams of trained troops with a back-up squad of 5 tooled-up professionals.
The Rescue team
2 x 4 man professional fire team, equipped with a selection of kitted out carbines, scoped assault rifles and SMGs, carrying smoke and stun grenades.
1 professional commander w/ carbine
1 x 2 man sniper team w/ crew served sniper rifle and carbine
The Villainous hostage takers
2 x 3 man trained hostage guard fire team w/ carbine, scoped carbine and either SMG or combat shotgun
1 x 5 man professional fire team w/ 3 carbines, 1 SMG and 1 compact LMG, all with sights and lasers, and 1 pirate gun.
The Hostages
2 professional hostages guarded by 1 guard team each, equipped with a pistol once released.
The Table
We set up a cluster of buildings in the centre, based on the road layout on the mat we were using. Some had fenced gardens, while the rest of the board was roughed up from heavy shelling and fortifying. The hostages were deployed in 2 of the buildings near the centre.
The hostage guards started unalert, while their backup squad was unalert in the opposite corner to the rescue squad's entry point and would join the battle once alerted.
The battle...
...was pretty brutal! The rescue squad had an early success, moving up on hostage building 1 and performing a tasty flanking action; the 3 hostage guards surrounded the stairs up to the hostage room on overwatch, but neglected to watch the outside road through the window they were stood a little too close to. One turn of shooting saw all 3 put down, and the first hostage quickly freed.
This was the start of the real battle, as the professional hostage takers began hurrying up to the building hostage 2 was held in. The 2 hostage guards inside the building took cover to avoid the snipers while the rescue team moved towards them, then began duelling with the rescue team's commander. He put up a brave showing, but eventually went down to a catastrophic wound.
The rest of the rescue team met with the hostage takers around the square, and to cut a long story short there was much violence, shooting, surpression and wounds caused. The rescue team took very heavy fire but set up for an FCO which made the hostage takers fall back in to the house to avoid the punishment. Attacking the building was tough, and saw several rescuers shot and exploded, but eventually they came through and the hostage taker commander was knocked out in close combat. With the rest of his force dead, victory went to the rescuers!
This was a great game with a lot of scary moments for both sides; 1 turn of short range shooting saw 3 dead and a whole lot of surpression on both sides. The initiative and alternating phases really work well with the rules, as losing initiative lets you avoid potential damage but forces some tough decisions about whether to stand and fight or fall back. There were 2 key moments that highlighted this:
- the rescue team combat sprinted to close in on the building before the hostage takers could set up their defence. As I had lost initiative, I could then pop my forces out for a turn of easy shooting with little comeback.
- the rescue team set up an 8-man FCO on my wounded professional squad when they won initiative; I had to fall back which saved my men but gave away a lot of ground for the next turn and left me out of position.
It was also nice to use some slightly larger forces, that allowed us to introduce some more rules like breaking down into smaller teams. For the next game we're going to look at list building (up to now we've just been using the models as they're equipped and throwing forces together), and possibly some off-table assets.


I've also been continuing development of our modern day terrain range, and the eagle eyed will have spotted a new small house and different fence design in this battle. The new prototype is the first of 3 to complement the larger McMansions, designed in the Scandinavian style. As with the other buildings, this will be an initial range of 3 variants.
More pics will be on Facebook so like our page to keep up with all the developments!


The Rescue team
2 x 4 man professional fire team, equipped with a selection of kitted out carbines, scoped assault rifles and SMGs, carrying smoke and stun grenades.
1 professional commander w/ carbine
1 x 2 man sniper team w/ crew served sniper rifle and carbine
The Villainous hostage takers
2 x 3 man trained hostage guard fire team w/ carbine, scoped carbine and either SMG or combat shotgun
1 x 5 man professional fire team w/ 3 carbines, 1 SMG and 1 compact LMG, all with sights and lasers, and 1 pirate gun.
The Hostages
2 professional hostages guarded by 1 guard team each, equipped with a pistol once released.
The Table
We set up a cluster of buildings in the centre, based on the road layout on the mat we were using. Some had fenced gardens, while the rest of the board was roughed up from heavy shelling and fortifying. The hostages were deployed in 2 of the buildings near the centre.
 |
| The board from the attacker's entry edge |
 |
| The rescue squad moving in |
The battle...
...was pretty brutal! The rescue squad had an early success, moving up on hostage building 1 and performing a tasty flanking action; the 3 hostage guards surrounded the stairs up to the hostage room on overwatch, but neglected to watch the outside road through the window they were stood a little too close to. One turn of shooting saw all 3 put down, and the first hostage quickly freed.
 |
| Using smoke to cover their advance, the rescue squad clear building 1 in short order. |
The rest of the rescue team met with the hostage takers around the square, and to cut a long story short there was much violence, shooting, surpression and wounds caused. The rescue team took very heavy fire but set up for an FCO which made the hostage takers fall back in to the house to avoid the punishment. Attacking the building was tough, and saw several rescuers shot and exploded, but eventually they came through and the hostage taker commander was knocked out in close combat. With the rest of his force dead, victory went to the rescuers!
This was a great game with a lot of scary moments for both sides; 1 turn of short range shooting saw 3 dead and a whole lot of surpression on both sides. The initiative and alternating phases really work well with the rules, as losing initiative lets you avoid potential damage but forces some tough decisions about whether to stand and fight or fall back. There were 2 key moments that highlighted this:
- the rescue team combat sprinted to close in on the building before the hostage takers could set up their defence. As I had lost initiative, I could then pop my forces out for a turn of easy shooting with little comeback.
- the rescue team set up an 8-man FCO on my wounded professional squad when they won initiative; I had to fall back which saved my men but gave away a lot of ground for the next turn and left me out of position.
It was also nice to use some slightly larger forces, that allowed us to introduce some more rules like breaking down into smaller teams. For the next game we're going to look at list building (up to now we've just been using the models as they're equipped and throwing forces together), and possibly some off-table assets.
 |
| Rescue commander down, forces about to clash |
 |
| Death and surpression left, right and centre |
 |
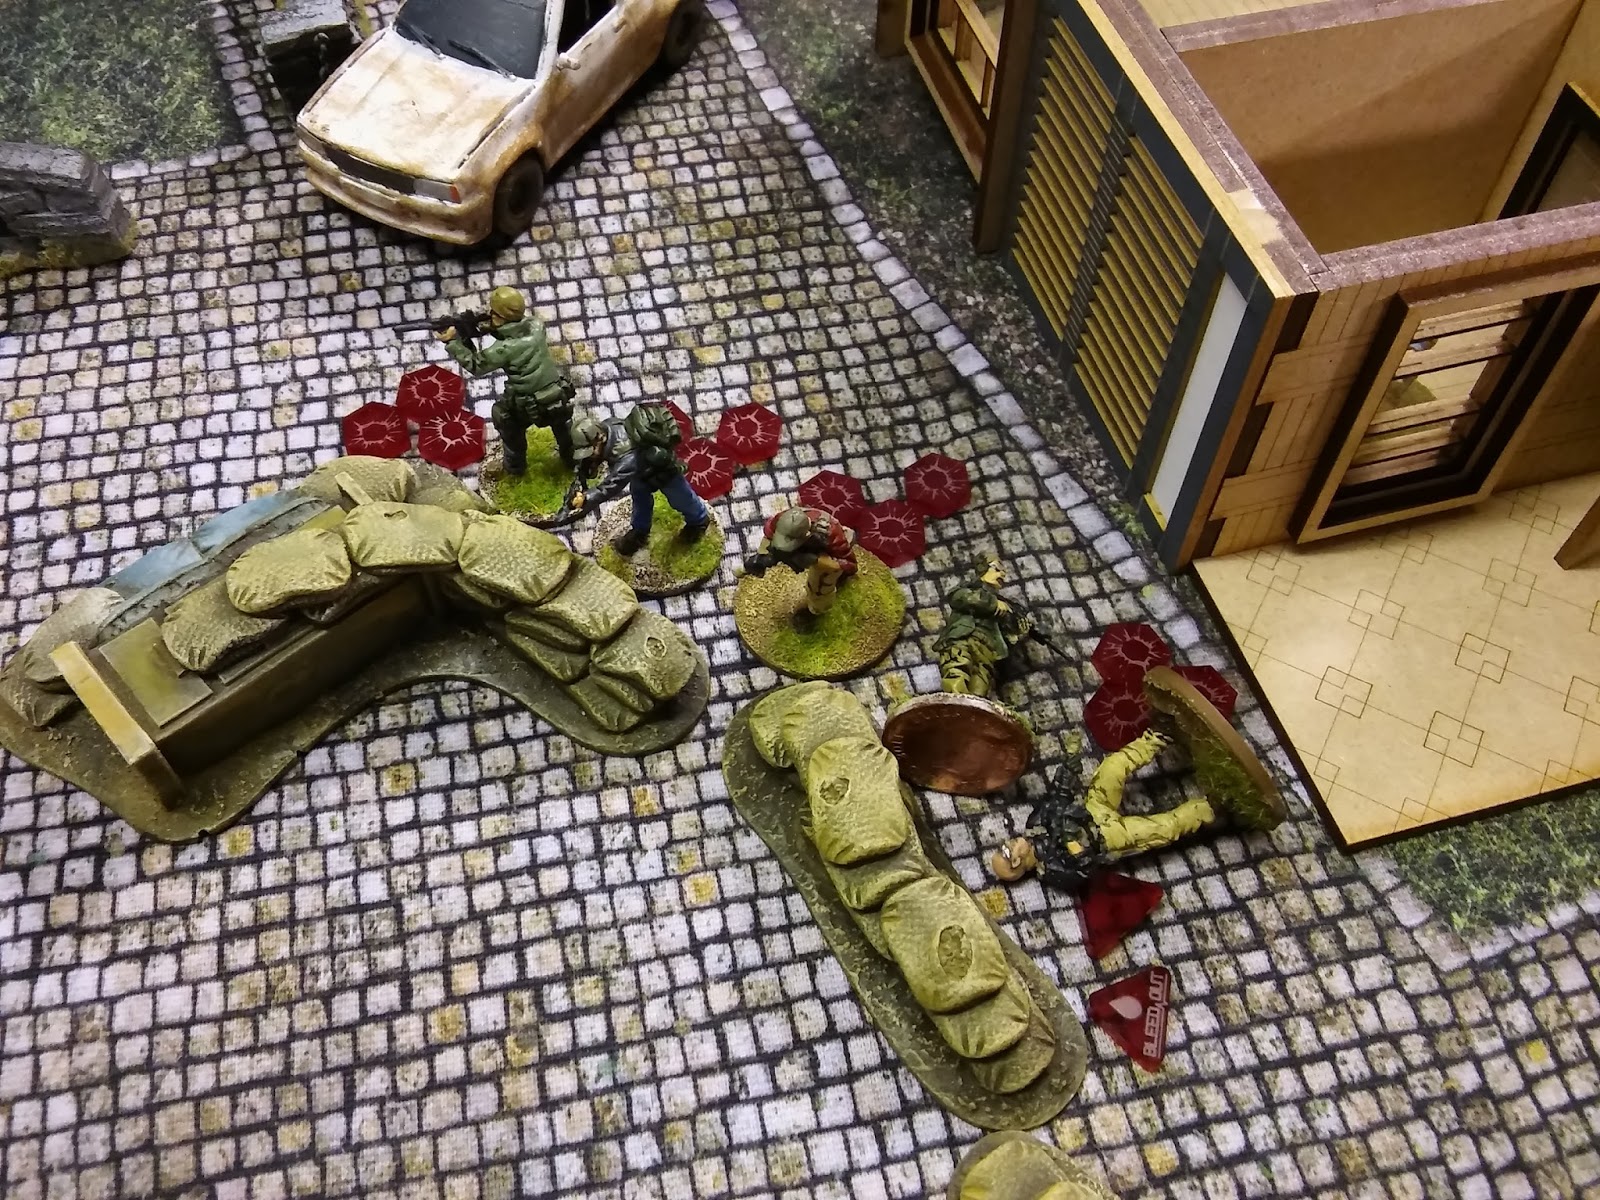
| 1 dead, 1 bleeding and 3 getting nervous |
 |
| 2 down and bleeding and the others shaken, but backup is on the way |
 |
| Both forces regroup ready to clash again |
 |
| Charging up a guarded staircase is a recipe for death |


I've also been continuing development of our modern day terrain range, and the eagle eyed will have spotted a new small house and different fence design in this battle. The new prototype is the first of 3 to complement the larger McMansions, designed in the Scandinavian style. As with the other buildings, this will be an initial range of 3 variants.
More pics will be on Facebook so like our page to keep up with all the developments!


Great AAR and fantastic terrain. From where is the mat?
ReplyDelete